recipes
Frøsnapper
Adapted from Cooking with Kathleen, aiming for the frøsnapper from Nielsen’s.
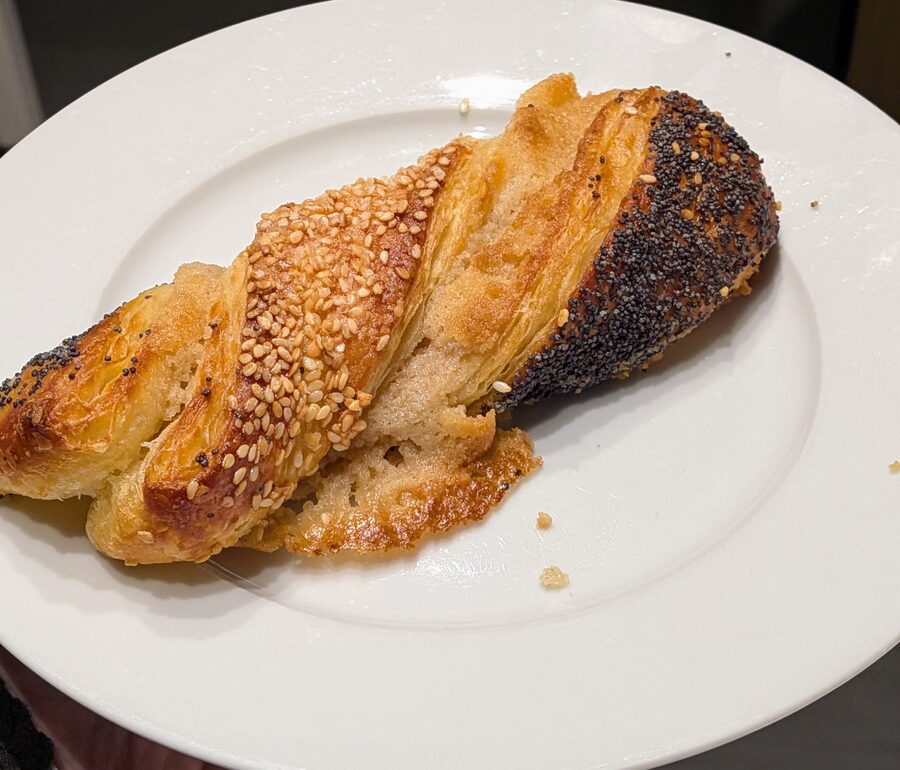
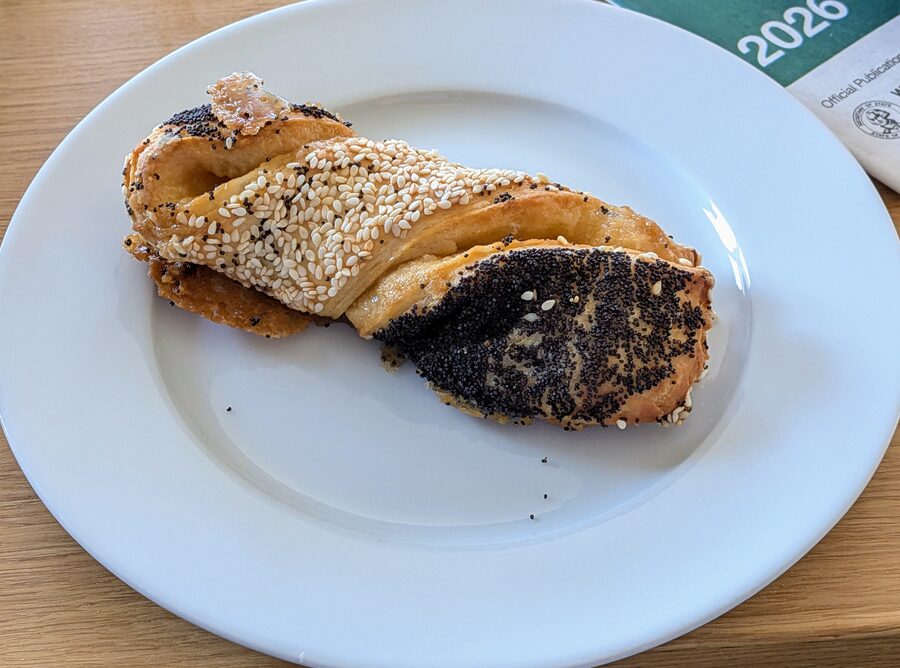
Mine (attempt 4) on the left, Nielsen’s on the right.
Makes: 12
A great frosnapper is relatively light and full of contrast:
- Flavors: Seed flavors balanced with almond filling
- Sweetness: Not too sweet overall and the sweetness isn’t evenly distributed. A touch of sweetness on the outside and more in the remonce, with less in the dough
- Textures: Soft inside with a little chew. Flaky exterior to the lamination. Sugar crunch from leaked and carmelized remonce
Attempt 4 was all done in one day, but it can be split across two with an overnight dough rise in the fridge.
Ingredients
Dough
- 3g yeast (1 tsp)
- 12g sugar (1 tbsp)
- 155g milk (150 ml)
- 3g salt (1/2 tsp)
- 1 egg
- 340g all-purpose flour (2 1/2 cups + 1 tbsp)
For the flour, it turns out fine with cheap flour. I think the lower gluten content helps. And there’s so many other flavors that the flour flavor doesn’t come through so much.
Butter block
- 250g butter (2 sticks + 1 1/2 tbsp)
For the butter, I use cheap butter with the cheese grater trick.
Filling (remonce)
- 65-70g butter (4 1/2 tbsp–5 tbsp)
- 80g sugar (1/3 cup + 1 tbsp)
- 1/8 tsp almond extract
- 60g almond flour (1/2 cup + 2 tbsp)
- pinch of salt
- cardamom, cinnamon to taste (about 1 tsp cardamom I think… maybe 1/2 tsp cinnamon)
I don’t keep marzipan around and it’s pricey but I had a bunch of almond flour I got on sale, so my remonce is based around almond flour instead.
A slightly loose filling is good. The caramelized sugary skirt around the base of Nielsen’s reference is leaked remonce.
Topping
- egg wash
- poppy seeds (it uses a lot, like 1oz or so)
- sesame seeds
Be careful when shopping for sesame: You want something with a mild nutty flavor. I had a bad batch using sesame from an Asian grocery, and I’m guessing it’s toasted.
Steps
Dough
- Bloom the yeast with the milk and sugar
- Mix ingredients and knead
- Let rise until about double (can be overnight in the fridge)
Butter block
- Form into approx 7x7 inch square (see Kouign Amann for tips on that). It’s important that it’s a square. It’s less important that it’s exactly 7x7.
- Chill after handling until it’s not in any danger of melting as you handle it
Folding
- Do the usual 3 folds, refrigerating between folds to prevent any chance of butter melt
Remonce
- Make it during the last fold’s chill, or while rolling out the dough (the gluten resists, so it’s handy to have something to do while it rests)
- Start with room temp butter. Cream it all together. You don’t want the butter melted, but it’s a real pain if it’s too cold so room temp is good.
Shaping
- Roll out to 30x40cm (preferably a little beyond that). The video says 60x30cm, but that’s not what she showed
- Let rest a little bit; it’ll want to spring back
- Spread the remonce on the bottom 15 cm x 40 cm half. It can be a pain to spread. Ok to use your hands and do final smoothing with a spatula or knife
- Fold in half lengthwise
- Seal the bottom edge by wetting the inside of the seam a little (why)
- Brush egg wash over top, spread poppy seeds all over. Also dust maybe 1-2 tsp of sugar
- Flip, brush egg wash, spread sesame seeds all over. Also dust ~1-2 tsp sugar.
- Roll gently with a rolling pin to press the seeds in and encourage it to flatten
- Trim left and right edges to neaten them
- Cut into 12 pieces
- For each piece, twist it twice and put it on a parchment-lined baking sheet. Press the ends down a bit. Place them touching one another (why). With them touching, all 12 could fit on one sheet; in attempts 1-3 they weren’t touching and needed 2 sheets
- After each sheet is filled, use a rolling pin and roll the line of top/bottom edges flat (why)
- Let proof 1-2 hours. I put them in my oven with the oven light on. It got warmer than I expected, which probably softened the butter so a little leaked out. That turned out to be good, since it caramelized some sugar on the edges
Baking
- 375-400°F for 18 minutes. That seemed a little underdone in attempt 4, though less so once they cooled. I set my oven to 400, but my oven thermometer only reached 375 even 15 minutes after the preheat beep (no convection, so it’s uneven)
- With two trays in a non-convection oven, rotate the pans halfway through
- Take out, let set for 3 min, then transfer to wire racks to finish
Keeping the shape
This was my biggest challenge. Most of these were in the batch that worked:
- Reduced yeast (2 tsp → 1 tsp): This definitely helped
- Rolling the seeded sheet flat before cutting, to squish the layers together: Not sure if this helped
- Placed them side by side: I’m pretty sure this helped
- Sealed the bottom edge with water: I’m not sure if this helped, but it was quick and didn’t hurt
- Pressed them into the parchment: I did this on previous attempts and it maybe helped a little bit, not a lot
- Rolling the edges flat once they’re on the tray: I’m pretty sure this helped
- Water to “glue” any edges that were lifting after the proofing: I have no idea if this helped
- Only 2 twists: trying to do more in other attempts I think partly caused the spring-back. Nielsen’s does 2 as well. When attempt 3 (3 twists) unwound, the advice I got from Claude was to twist more, 5-6 turns. Fewer worked better
- Chilling after shaping (proofing in the fridge): I tried this in one of the attempts and they still unwound. Proofing wants warmth and holding the shape wants cold, so the two goals pull against each other
Attempts
Attempt 1: Bad
Used a recipe that Claude found, but the recipe was just plain wrong – something like 30% hydration and I couldn’t even mix it. I had to work water into the dough to up the hydration, which took 30-45 min and was pretty frustrating. Then I did a filling that Claude suggested and tried making them without lamination.
Results:
- Without lamination, the dough isn’t very good at all.
- The filling was fine. It didn’t melt out, but maybe oozed a bit
- They really didn’t want to hold their shape, probably because the dough was too dry and stiff
- Something about the seeds didn’t jive with the filling in terms of flavor. Maybe I got the wrong sesame seeds? (This was shiro goma from Shirakiku)
- Overall, it wasn’t as light as Nielsen’s, nor as sweet
Things to change:
- Just start from a laminated dough I trust, like kouign amann maybe
- Research the filling aka remonce more
- Research the seed flavors
Attempt 2: Progress, but so much further to go
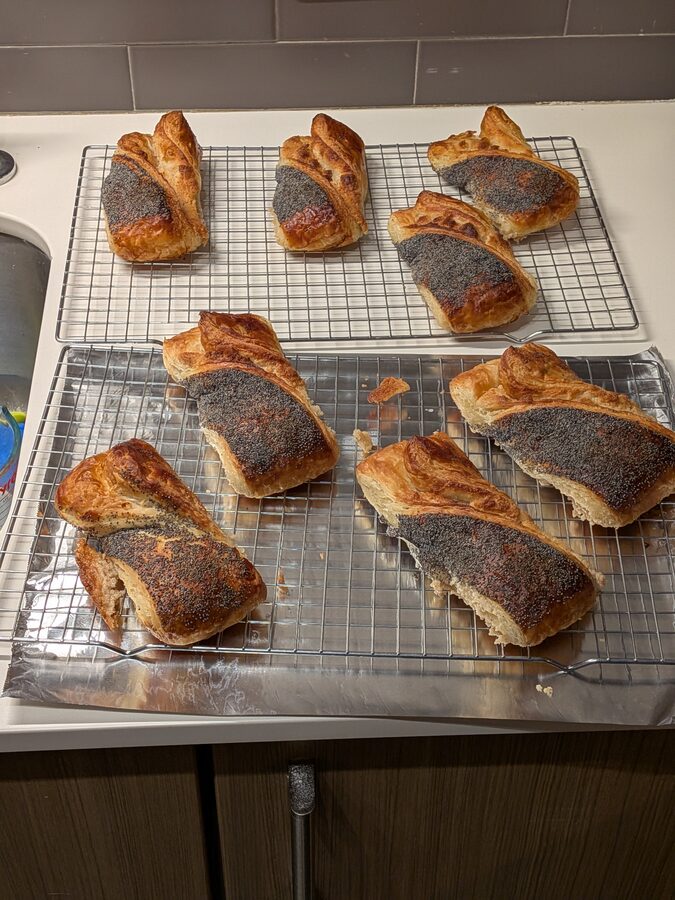
I started from the kouign amann dough and cut the butter at Claude’s recommendation. I also cut it into 8 instead of 12 and only used poppy, no sesame. Also used egg wash. I also waited plenty of time for proofing.
Results:
- Definitely lighter and flakier
- WAAAY too big. I think it’s because the KA recipe made more dough than the frosnapper dough, and also because I made them wider
- The little pans were too small for 4 each
- The flavor was pretty good but not really the Nielsen’s style
- They tend to unwind but I don’t really know why
Things to change:
- Adjust the dough amount properly
- 12 instead of 8
- Use multiple big trays, which means I gotta use the big oven ugh
Attempt 3
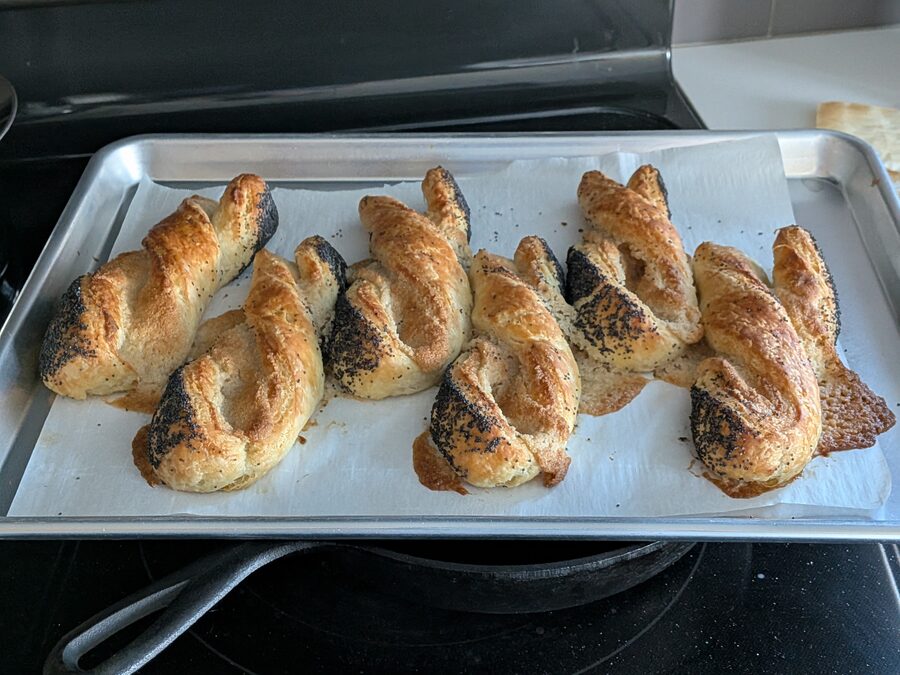
Switched to the dough and amounts from Cooking with Kathleen.
- Not sure about the butter block size, I guess go standard for it
- Also not sure about the rolled size. She said 60x30cm but that’s not what she showed in the video
- She twisted once more than I did
- 375 for 15 min, but they didn’t hold their shape
Results:
- Pretty good! Getting closer to Nielsen’s
- I didn’t use any regular flour, and reduced the almond flour a little
- I twisted maybe one extra time
Attempt 4: Amazing
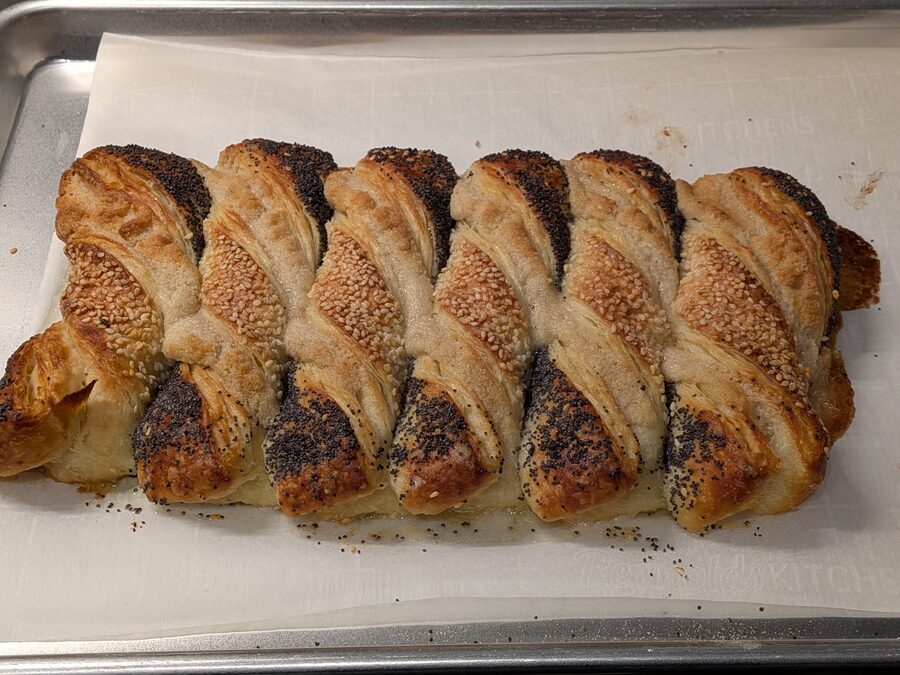
Changes from attempt 3:
- Half the yeast
- Rolled out a little over 30x40
- Added sesame
- No flour in the filling, a little extra butter
- Sprinkled sugar when coating with seeds
- Packed side by side
- Rolled the ends down
- Sealed the edges with water
- 18 min @ 400-ish – a little underdone, rotating the pans halfway
Results:
- Amazing
- Once they cooled they seemed less underdone than I feared. With the same oven and temp, maybe go a little longer
- I froze them to reheat later, so slightly underdone is good anyway. If I were making them to eat right away, I’d bake maybe 2 min longer.
Next time:
- Probably bake in my convection toaster oven, which heats up MUCH faster. That’ll change the timing a bit
The recipe above is attempt 4.
References
- Frøsnappere (Cooking with Kathleen) (source for attempts 3 and 4)